 Use the Setup options to set up and adjust Wi-Fi, Wi-Fi printer setup and selection, user information, default language, display settings, sounds settings, shop information, user management, connected accessories, and device information.
Tap ![]() to return to the previous screen or
to return to the previous screen or ![]() to return to the Main Menu.
to return to the Main Menu.
Wi-Fi
 Use WiFi to view, add, and delete wireless networks.
Tap on the WiFi icon to display a list of detected and configured WiFi networks.

Adding A Network
1.Tap ![]() to add a WiFi network.
to add a WiFi network.
A list of detected wireless networks is displayed with • next to the selected network.
2. Tap > to access the network Security and IP Settings.
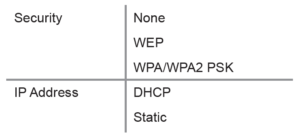
3. Tap → to configure the selected network.
4. Once the network has been successfully configured, tap to return to the list of available configured networks. A • indicates the selected network.
Deleting A Network
1. Tap a displayed network.
2. Tap ![]() to delete the network and tap Yes to confirm.
to delete the network and tap Yes to confirm.
User Settings (Admin Only)
 Modify Usernames and Passwords.
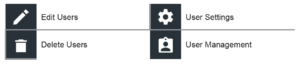
User Management (Admin Only)
1. Tap ![]() to access User Management functions.
to access User Management functions.
2. Tap![]() to display the current logged in Admin user.
to display the current logged in Admin user.
3. Select a displayed user by tapping it.
4. Tap ![]() to edit the Username, Password, and User Type (Standard or Admin).
to edit the Username, Password, and User Type (Standard or Admin).
5. Tap X when complete to return to the User Management screen.
6. Tap ![]() to delete the selected user and Yes to confirm.
to delete the selected user and Yes to confirm.
Language Settings
 Use the Language & Input function to select the default system language used by the tool. User defaults also include Test Results, Email, and Print languages.
System Language
Select the charger default standard language.
Test Result Language
Select the default language for the charger to use for all displayed tests and results.
Display Settings
 Adjust the charger display including the Brightness, Sleep Time, and Dim Time. Auto Brightness can also be turned on and off.
Brightness
Adjust the display Brightness by tapping and holding the slider, then moving it right or left to make the screen brighter or darker.
Auto Brightness
Enable and disable Auto Brightness by taping on the check box.
Sleep Time
Adjust the amount of elapsed time before the charger goes into a power saving (Sleep) mode. Default = 2 minutes.
Dim Time
Adjust the amount of elapsed time before the charger goes into a power saving (Dim) mode. Default = 1 minute.
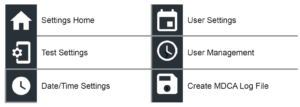
Shop Information (Admin Only)
 Access default Shop Information including Store Name, address, and phone number. Also access battery test defaults including rating, temperature units, and decimal separator. Use also to adjust the tester date and time settings.
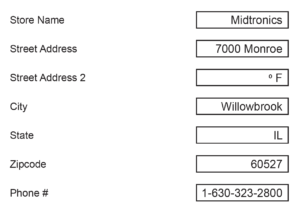
Shop Information
Use the onscreen keypad to enter the store name, address, and phone number.
Test Settings
1. Tap![]() to access the test setting defaults. Tap the boxes or icons to change the values.
to access the test setting defaults. Tap the boxes or icons to change the values.
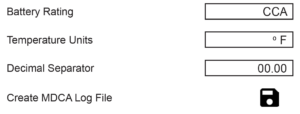
Battery Rating
Default battery rating units used when testing batteries.
Temperature Units
Default temperature units used when measuring battery temperature.
Decimal Separator
Default number display using commas or periods separators.
Create MDCAL Log File
The MDCA function is used by Midtronics technical support.
2. Tap ![]() to return to the Shop Information screen.
to return to the Shop Information screen.
Date/Time Settings
1. Tap ![]() to access the Date/Time setting defaults.
to access the Date/Time setting defaults.
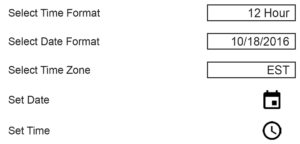
Select Time Format
12 or 24 Hour Format
Select Date Format
Month/Day/Year, Day/Month/Year, or Year/Day/Month
Select Time Zone
Time zone in which the analyzer will be operated.
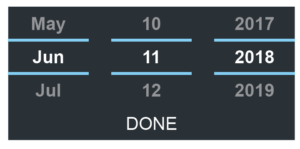
Set Date
Tap or ![]() to enter the month, day, and year. Tap Set to save the date or Cancel to exit without saving.
to enter the month, day, and year. Tap Set to save the date or Cancel to exit without saving.
Set Time
Tap or ![]() to enter the hours, minutes, and AM/PM. Tap Set to save the date or Cancel to exit without saving.
to enter the hours, minutes, and AM/PM. Tap Set to save the date or Cancel to exit without saving.

2. Tap ![]() to return to the Shop Information screen.
to return to the Shop Information screen.
Version Information
 Use Version Information to display WiFi connection data the Diagnostic Device, and Device software version information.
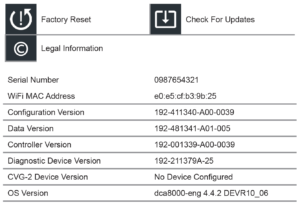
Factory Reset
Use this function to return the tool to the original as built configuration including all history and test settings.
IMPORTANT: All previous modifications to the original settings will be overwritten.
Legal Information
Displays software attribution information via the Midtronics website. The analyzer must be connected to the Internet.
Check for Updates
Use this function to check via the internet connection for any updates to the tester software.