1. Upon initial power-up, the Language Settings screen is displayed on the screen. Tap Next to continue.
| System Language | Select the default language displayed on the screen |
| Test Result Language | Select the default language for all displayed tests and test results |
| Email Language | Select the default language for sending emails |
| Print Language | Select the default language for printouts |
2. A Consent to Collect Data screen is displayed. Tap the Consent check box and then tap Next to continue.
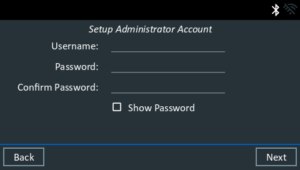
3. The Admin Account setup screen is displayed. Enter a username and password if you wish to set up an admin account. If you do not, you must establish at least one user account, but can have the password be optional. Enter the username and select Next.
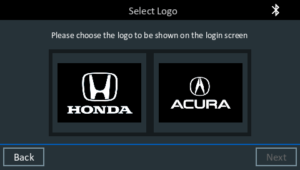
4. The brand selection screen is displayed. Please select either Honda or Acura depending on your dealership and select Next.
5. The Date/Time Settings are displayed. Tap Next to continue after making any adjustments.
| Select Time Format | 12-hour or 24-hour format |
| Select Date Format | DD/MM/YYYY, MM/DD/YYYY, or YYYY/MM/DD |
| Select Time Zone | Time zone offset from Greenwich Mean Time |
| Set Date | Set the current date |
| Set Time | Set the current time in the selected time zone |
6. The Test Settings are displayed. Tap Next to continue after making any adjustments.
| Battery Rating | Default: Cold Cranking Amps (CCA) |
| Temperature Units | Select Fahrenheit or Celsius |
| Decimal Separator | Select decimal point or comma |
7. The Device List screen is displayed. Select Next to continue.
8. A listing of detected Configured WiFi networks is displayed.
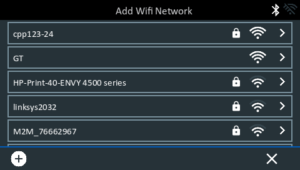
To select a network: For initial setup, no networks will be displayed here yet.
To add a network: Tap the plus (+) sign, then select from one of the displayed detected networks.
To manually add a network, tap the plus (+) sign again. Follow the on-screen instructions to select the Network SSID, Security, and IP Settings. Tap Next when finished.
Use the onscreen keypad to manually enter the Network SSID, security type, and IP settings. If necessary, enter the WiFi network password. Tap Next when finished.
A confirmation screen is displayed when the analyzer has successfully connected to the WiFi network.
To delete a network: Tap a displayed network to select it. Tap trash can icon  to delete it.
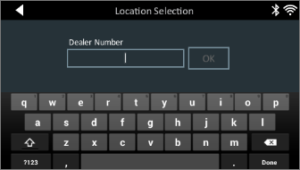
9. The Location ID screen will be displayed. Enter your location/dealer ID and press OK.
Verify your location by selecting Verify or if this is the incorrect location information, select Reconfigure to allow yourself to re-enter the Location ID.
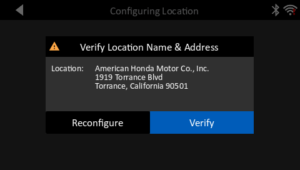
10. Once your location is confirmed the BMIS login information screen will display. This will confirm your location and your connection status to BMIS. If everything is correct, select Next.

11. Next you will go to the email address book. You can add email addresses to be stored in the tool by selecting the (+) sign. This will allow you to access the stored email address for sending records directly from the tool. This step can also be skipped during Initial Setup and email addresses added from the Settings menu. Select Next.
12. The final Initial Setup screen will allow you to enter your Shop information. This includes the name, address and any other fields you may want entered. The information entered here will be displayed on the top of the onboard tool printouts, as well as emailed results send from the tool.
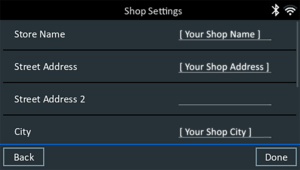
Select Done to proceed to the Login screen.
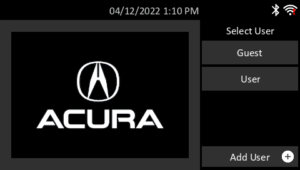
13. Here you will see the login screen according to what brand you selected, as well as the usernames you created earlier. Select a User to go to the home screen and get started.